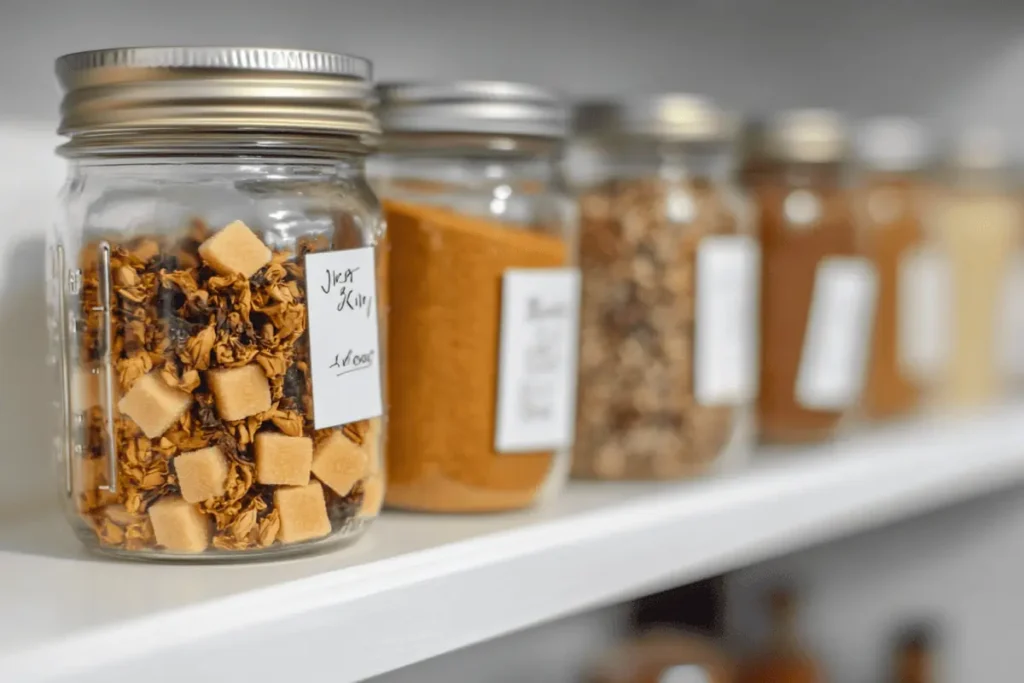
Homemade stock cubes are a great way to add flavor to your dishes. They are convenient, save space, and reduce waste. Indeed, learning how to make dried stock cubes lets you keep a supply of savory goodness on hand. You can tailor them to your liking by choosing herbs, spices, and vegetables that suit your taste. When you dehydrate or reduce liquid stock, you transform it into compact little cubes that last for months. Moreover, turning homemade stock into a dry product helps you manage ingredients and limit additives. This process might seem complex, but it is simpler than you might think. With proper preparation and storage, you can create dried stock cubes that boost your meals every day.
Additionally, dried stock cubes can replace store-bought options that often contain preservatives. You can make a big batch and use these cubes in soups, sauces, stir-fries, and more. When you understand how to make dehydrated stock, you gain flexibility in seasoning. You can skip artificial flavors and adjust sodium levels. Meanwhile, you free up pantry or freezer space. Plus, it is an enjoyable weekend project. By the end of this guide, you will feel confident about how to turn liquid stock into cubes and store them properly. So let us dive into the basics, explore tips, and discover how these little cubes can make cooking more convenient.
Table of contents
What You Need for How to Make Dried Stock Cubes
To begin, gather the basics for making homemade stock. You can use leftover chicken bones or vegetable scraps, depending on whether you want a meat-based or vegetarian option. Vegetables such as onions, carrots, and celery form the classic trio, but you can add other items like mushrooms or garlic for extra flavor. Herbs like thyme, rosemary, or bay leaves deliver aromatic notes. Also, keep in mind that a broth cube might differ slightly in flavor from a standard stock cube, depending on the ratio of bones to vegetables. If you prefer a lighter taste, focus on more vegetables and fewer bones.
Because you will dehydrate or reduce the stock, remember to use minimal salt at the start. The cube will concentrate flavors, including salt, so you can always add it later if needed. For the cooking vessel, a large pot or slow cooker works nicely. Then, you will need a reliable strainer to remove solids. After that, you must decide on your drying method. Some people use an oven set to low heat. Others rely on a dehydrator. Each approach can yield great results. Lastly, an ice cube tray or silicone mold will shape your mixture into neat cubes, though you can also slice it after it dries.
Step 1: Make the Base Stock
First, prepare a rich, flavorful stock. If you already know how to make your own stock cubes, you are familiar with soup-making basics. Place bones (or vegetables) in a pot and add enough water to cover them. Then, include onions, carrots, celery, and herbs. Bring the mixture to a gentle boil, reduce heat, and simmer for at least two hours. For extra depth, you can roast bones and vegetables in the oven before simmering. That step caramelizes surfaces and adds complexity.
Skim off foam that forms during cooking. This practice helps keep the liquid clear. Meanwhile, taste the stock occasionally. Because you aim to create dried stock cubes, you want a bold, concentrated flavor. If your stock seems too mild, simmer it longer or add more herbs. Once the stock has a rich taste, strain out the solids. Discard or compost them, or save the meat if it is still tender enough to use.

Step 2: Concentrate the Stock
Now that you have a strained liquid, you must reduce it. To do this, return the liquid to the pot. Then, simmer until it thickens or the volume decreases. The more water you evaporate, the more intense the flavor becomes. In some cases, you might reduce it by half or even more. This process forms the basis for how to turn liquid stock into cubes with a robust taste. Keep in mind that you can also remove extra fat. Let the stock chill in the fridge. Skim off solidified fat from the top if you wish.
At this stage, you can adjust seasonings. If you want a more herbal note, toss in some fresh herbs or spices as you reduce the stock. If you plan to use these cubes in many different dishes, keep the flavor versatile. You can always add more seasonings to specific recipes later. Just do not oversalt the liquid. You do not want your dried stock cubes to become too salty.
Step 3: Dehydrate or Freeze into Cubes
After reducing, you have two main paths. One approach is to freeze highly concentrated stock in small molds. You can freeze them, then store them in freezer-safe bags. When needed, you pop one out and dissolve it in hot water or add it to your dish. However, if you want true dried stock cubes, you must remove more moisture. This is where a dehydrator or low oven helps. Spread your thick stock on a tray lined with parchment or a silicone mat. Aim for a thin, even layer. Set your oven to the lowest temperature or use a dehydrator set at around 140°F (60°C).
Over several hours, the liquid will gradually dry. You may need to flip or stir it occasionally to speed up moisture loss. The result is a leathery sheet or crumbly powder. Once fully dry, you can break or cut it into small segments. Alternatively, you can grind it into a powder, then compress it into cubes. Keep an eye on the dryness; any remaining moisture can cause mold. This technique might sound time-consuming, but it yields shelf-stable cubes or powders that do not need freezing.

Different Methods for Dried Stock Cubes
Some cooks prefer a semi-dehydrated state. They freeze their reduced stock in an ice cube tray, pop the cubes out, then wrap or store them for convenient use. Others prefer a completely dried, shelf-stable product. Let us examine each method more closely.
Freezer Method
- Reduce Stock: Simmer stock until you have a thick base.
- Cool and Skim Fat: Chill and remove excess fat for clarity.
- Portion into Molds: Pour thickened stock into an ice cube tray or silicone mold.
- Freeze Until Solid: Once frozen, pop cubes out.
- Store in Bags: Keep cubes in airtight freezer bags for up to three months.
This approach is simpler but still requires freezer space. The cubes remain quite soft at room temperature. However, they dissolve easily in soups or sauces.
Oven or Dehydrator Method
- Reduce Further: Cook the stock until it is very thick, almost syrupy.
- Spread and Dry: Pour the mixture onto a lined tray. Dry it in an oven set to low heat or use a dehydrator.
- Check Progress: Turn or break up pieces to speed drying and achieve even dehydration.
- Break or Cut: Once fully dry, cut or snap it into small squares or crumble into powder.
- Store Airtight: Keep in a sealed jar to avoid moisture absorption.
This method yields a shelf-stable product you can store at room temperature. The dryness ensures the cubes resist spoilage. Yet, they need more work and time to achieve dryness.
Tips for the Perfect Homemade Stock Cube
Crafting your own dried stock cubes can be rewarding. However, certain tips can elevate the process. For instance, always start with quality ingredients. If your bones or vegetables are stale, your cubes might taste flat. Also, do not rush the simmering or dehydration. Flavors develop best with slow, steady heat. If you aim for a broth cube, use more vegetables and fewer bones. This approach imparts a gentler taste.
Next, consider how you want to store your cubes. If you choose the freezer approach, it can be wise to label your bags with the date. Then, you use older cubes first. If you go the dried route, pick a container that seals tightly, such as a mason jar. Keep them in a cool, dark place. Moisture is the enemy of shelf-stable products. If you see any signs of dampness or mold, discard them to stay safe.
Customizing Flavor
One joy of homemade cubes is the freedom to experiment. Feel free to add mushrooms for umami, tomatoes for acidity, or chili peppers for heat. For an Asian-inspired blend, throw in ginger, lemongrass, or soy sauce (though watch sodium). You could also keep it basic—just onions, celery, and carrots—so the cubes adapt to a variety of cuisines. Meanwhile, a mix of herbs like thyme, rosemary, and sage can impart a holiday vibe to your dishes. That freedom makes homemade cubes special and more versatile than store-bought ones.

Why Learn How to Make Dried Stock Cubes?
Many store-bought cubes contain preservatives, excess sodium, or fillers. They might not align with your health goals or flavor preferences. By making your own, you control every aspect. You can choose organic produce, limit salt, and skip additives. Meanwhile, these cubes reduce food waste. You can save bones, veggie trimmings, or leftover scraps for the stock pot. It is also cost-effective. You repurpose items you might otherwise throw away.
Furthermore, dried cubes are lightweight and easy to transport. If you enjoy camping or traveling, you can pack a few homemade cubes to upgrade campfire meals. They also last longer than fresh stock. You do not have to dedicate freezer space for bulky containers. Instead, store them in a pantry or spice cabinet. Another benefit is better taste. Fresh ingredients, slow simmering, and controlled dehydration often produce more vibrant flavors compared to mass-produced cubes.
Conclusion
Learning how to make dried stock cubes offers immense versatility in the kitchen. You can prepare soups, stews, sauces, or casseroles at a moment’s notice. By reducing liquid stock and forming cubes, you also extend the product’s shelf life. At the same time, you reduce additives compared to store-bought versions. Above all, these homemade cubes are simple to use. You can toss them into a pot or pan and enjoy bold flavors that stand out. If you prefer an easier route, freeze your concentrated stock in cubes. If you crave true shelf-stable convenience, fully dehydrate your mixture. Either way, you will have a stash of flavorful cubes at your fingertips.
Experiment with different herbs, vegetables, or even spices. Make a big batch or small test runs to find the perfect taste balance for your family. You can also cater to dietary restrictions by controlling salt levels or skipping certain ingredients. Ultimately, dried stock cubes save time and money while promoting a deeper, more customized flavor than many commercial brands. Now that you know how to turn liquid stock into cubes, you can bring culinary creativity to your everyday meals.
Frequently Asked Questions
How do I make my own stock cubes?
Simmer bones or vegetables to create a flavorful stock. Reduce it, then either freeze it in molds or dehydrate it into cubes. Store in airtight containers.
How to make dehydrated stock?
Cook your stock until thick, spread it on a sheet, and dry it in a low oven or dehydrator. Break the dried layer into cubes or crumble it into a powder.
How to turn liquid stock into cubes?
Concentrate the liquid by simmering. Then, pour it into an ice cube tray or spread it thinly for dehydration. Freeze or dry until solid, and store them properly.
What is the difference between a stock cube and a broth cube?
A stock cube often contains more bones and yields a richer, deeper taste. A broth cube can focus on meat and vegetables, offering a lighter flavor.

